

Adding Images to Your Blog Article on Algorithm Institute
Images make your blog articles more engaging, help illustrate complex concepts, and break up long blocks of text. Algorithm Institute includes a user-friendly image uploader for adding visuals to your posts.
Why Use Images
Visual content increases engagement and information retention. Screenshots are invaluable for tutorials showing exactly where to click. Diagrams explain abstract concepts. Relevant photos make your post more professional and visually appealing.
Image Preparation
Before uploading, prepare images for web use. Crop screenshots to show only relevant areas. Resize to a maximum width of 1200 pixels for fast loading. Save screenshots in PNG format and photos in JPG for best quality-to-size ratio.
Uploading an Image
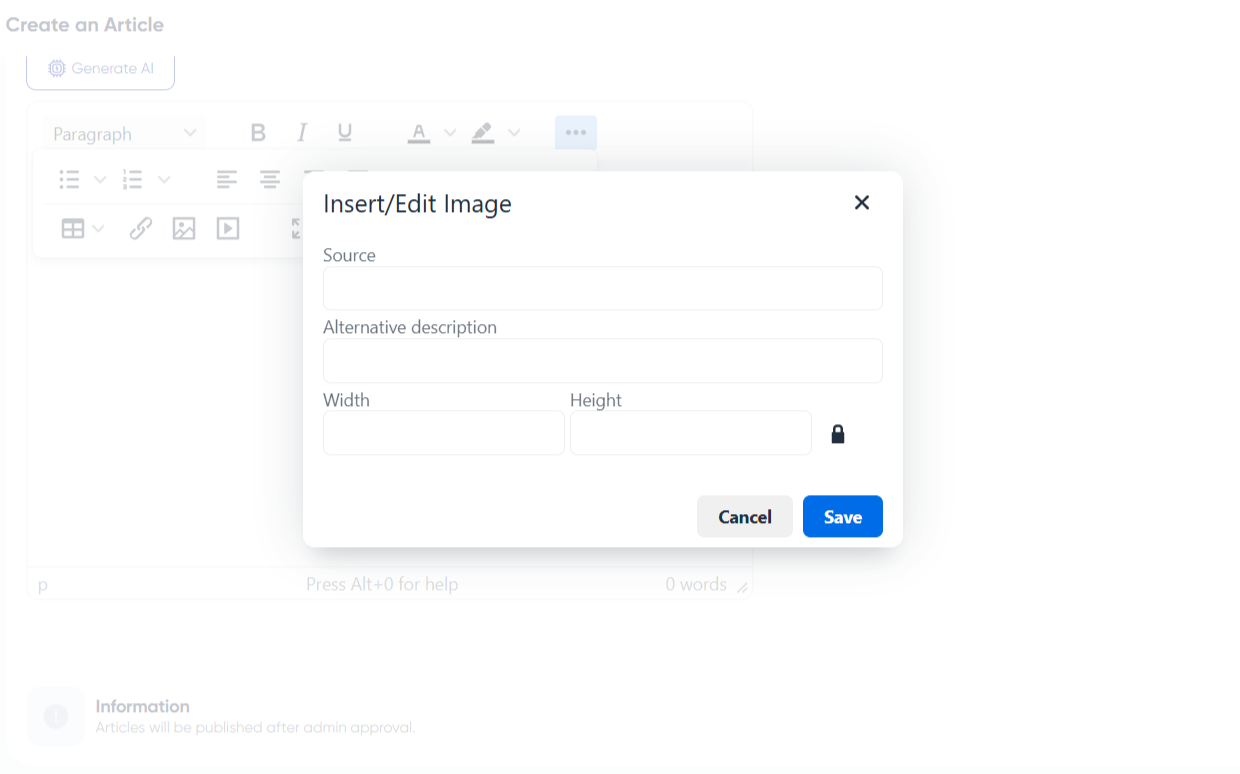
In the blog editor, place your cursor where you want the image. Click the image icon in the toolbar or "Add Media." Select the file and wait for upload to complete. Adjust size and alignment in the editor.
Adding Alt Text and Captions
After inserting, add descriptive alt text in the settings panel. Alt text is important for accessibility and helps search engines understand your content. Describe what the image shows in a concise sentence. Add visible captions for context.
Positioning and Alignment
The editor allows left, right, or center alignment. Centered images work well for standalone visuals. Left or right alignment works for images accompanying adjacent text with text wrapping.
Using Diagrams and Infographics
For technical posts, create diagrams using tools like draw.io or Canva. Flowcharts, architecture diagrams, and comparison tables help readers visualize relationships and step-by-step processes.
Troubleshooting
If an image fails to upload, check that file size is under the platform limit (typically 5 MB) and format is supported. Re-upload any problematic images and update the post.


Reply to Comment